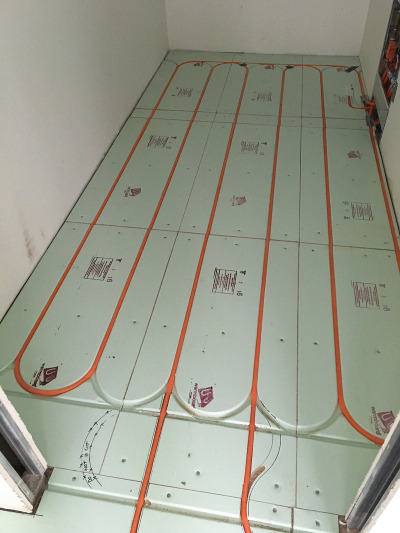
Most of the pipe route is set by the channels in the panels. Custom routes are extra channels routed on site, usually to bring pipe back to the manifold, to get around an obstacle, or where a loop changes on site.
The pipe loop plan in your plan set shows where custom routes go. Mark them on the panels before you start.
The installation kit includes routing templates for common curves, a template guide (19.8 mm inside, 25.4 mm outside diameter), a guide lock nut and a 16 mm core box router bit. Do not attempt a route without them.
The router
Use a router of at least 1.5 kW (2 hp); 1.65 kW (2.25 hp) is recommended. Its sub-base must take the supplied metal template guide. Warmboard Inc suggests the Makita RF1101, or an equivalent.
Templates
Use the timber templates in the kit for common curves. For longer custom routes, you may prefer to make templates on site.
Routing procedure
Fix the template Place the template over the area and fix it with 3 screws, clear of the router’s path.
Set the depth Set the bit so its tip only just bites into the aluminium surface.
Rout the channel Make the route in one steady pass.
Check the channel Check it’s smooth and even, then remove the template.
Deburr Smooth the aluminium edges with a 100 mm angle grinder or a deburring tool, ready for the pipe.
Clean out Vacuum the debris out of the channel.
Test fit Lay a piece of pipe in the new channel to check it sits level and flush with the panel.
Checklist
Plans: Review the pipe loop plan and mark every custom route with a permanent marker and the timber templates.
Router: Fit the bit, template guide and lock nut before you start.
Room to work: Routers need room and can be hard to use near a wall. Plan routes so the router base can move freely.
Speed and feed: Match the router speed to the feed rate. A router that bogs down cuts poorly and wears out sooner; cutting slowly at high speed burns out bits.