Australia

Get started › Architects

Architects and designers

From early concept to documentation and tender, Warmboard fits into your project

Start with a conversation

The first step is to email design@warmboard.com.au or call us on 1300 137 407, so we understand your project. We can then make recommendations based on your design and your client’s needs.

Our aim is to be your hydronic heating partner: we give you the product information and advice you need to make the right decisions, from the first sketch to handover.

Early design stage

Bringing Warmboard in early makes the rest of the project simpler. Floor build-up, framing, heating zones, the heat pump position and manifold locations are all settled before documentation, not changed on site.

Warmboard-S is laid over joists at 406.6 mm centres, so knowing early lets the engineer and builder set out the framing to suit.

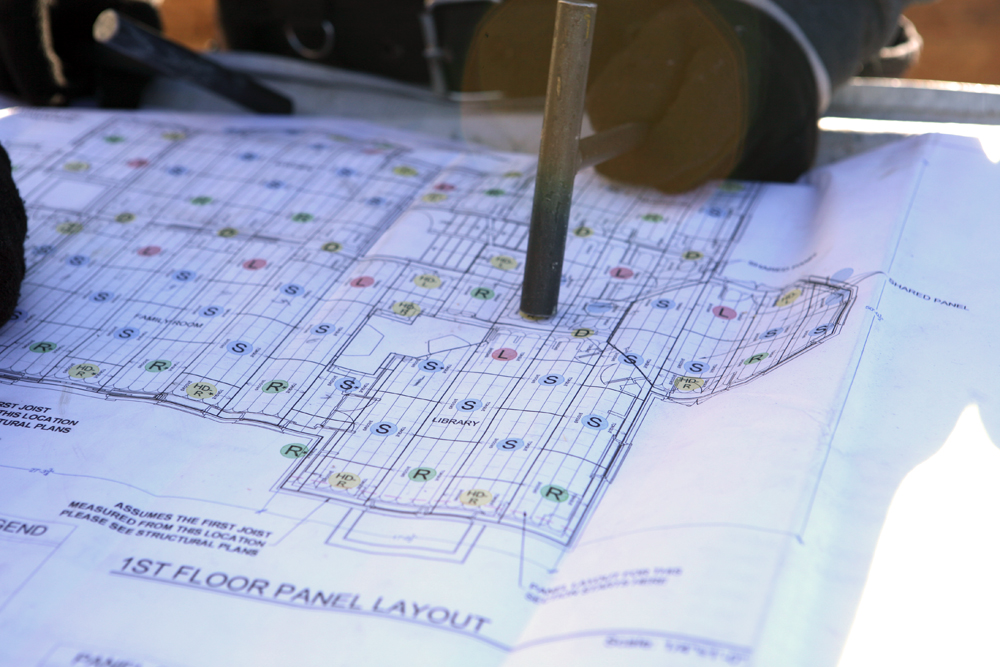
Warmboard panel layout plan for a first floor

Why specify Warmboard in your documents

  • Consistent quoting:
    When every contractor prices the same system, you and your client can compare quotes easily.
  • Drawings in the documentation set:
    Warmboard’s panel layout and pipe loop plan sit with your drawings, so everyone on the job works from the same information.
  • A better finished result:
    Detailed plans mean fewer decisions on site and a heating system installed as designed.
  • The specification holds:
    With Warmboard’s drawings in the set, the system your client chose is the system that gets built.

To work with us, here's what we'll need from you

Floor plans

In PDF or AutoCAD (DWG or DXF), including the joist layout (for Warmboard-S) and elevations with window and door details, if available.

Phone call

About 10 to 15 minutes to talk through heating zones, manifold locations, joist direction, the heat pump position and which Warmboard panel suits the project.

Project confirmation

Once the project is confirmed, Warmboard’s design team draws the panel layout and pipe loop plan. We stay in contact with you and your client throughout.

Material details

We supply projects in two ways: Warmboard panels only, or a complete system with Warmboard panels, plumbing components and controls. Either way, we need to know where the heat pump will sit outside the house and where the manifolds will go inside, because these positions shape the pipe loop plan.

Space needs vary from project to project. As a guide:
  • Manifolds:
    Warmboard Inc’s guide is a mounting space of about 360 mm wide by 915 mm high for a 2-port manifold, adding about 50 mm of width for each extra port, up to about 660 mm wide for an 8-port manifold. We confirm the size for the manifold supplied with your project.
  • Manifold position:
    Choose a central, accessible spot such as a cupboard or wall cavity, so pipe runs to each room stay short.
  • Heat pump:
    The outdoor unit needs a level base and clear space around it for airflow, as set out by its maker.
  • Indoor plant:
    For complete systems, allow space for components such as a buffer tank and pump group. The sizes depend on the design, and we’ll give them to you during design.
  • Panels-only projects:
    Manifold space stays the same; the space needed for the heat source depends on the equipment your plumber chooses.
  • On the plans:
    Manifold and plant positions are shown on the preliminary drawings, so you can check them against your design.
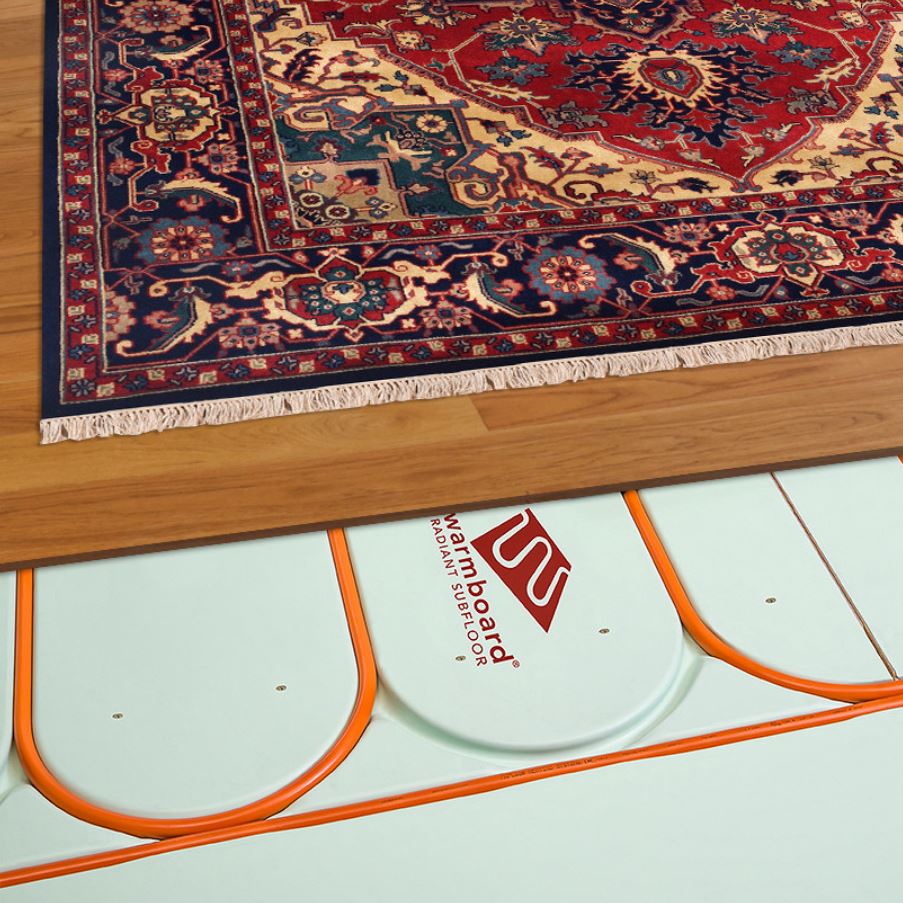
Warmboard panel with pipe in its channels, partly covered by timber flooring and a rug

Flooring

Warmboard gives your client a wide choice of floor coverings: engineered and solid timber, tiles and stone, vinyl and hybrid, carpet and cork.

Each product should be approved by its maker for use over floor heating and laid to the maker’s instructions.

Floor coverings over Warmboard

  • Engineered timber:
    Glued directly to Warmboard, following the timber maker’s instructions for floor heating.
  • Solid timber:
    Nailed or glued over Warmboard following the timber supplier’s instructions for floor heating, including acclimatising the boards before laying.
  • Tiles and stone:
    Laid over Warmboard with a suitable underlay or membrane and adhesive. The tiler should follow the adhesive maker’s instructions for heated floors.
  • Vinyl and hybrid:
    Check the product is rated for floor heating. Some floating floors need a specific underlay or an underlayment sheet, so check with the maker.
  • Carpet:
    Choose a thin, dense underlay suitable for floor heating, as carpet and underlay add insulation over the heating.
  • Cork:
    Suitable where the cork maker approves it for floor heating; it may need an underlayment sheet.

We keep a list of flooring and adhesive products used over Warmboard. Ask us for a copy before your client chooses a floor covering.

Heat pump placement and noise

Most air-to-water heat pumps run quietly, but placement still needs care. Allow clear space around the unit for airflow, keep it away from bedroom windows and boundaries where possible, and check local council and Australian requirements for noise and placement.

Your plumber or heat pump supplier can confirm the clearances for the model chosen.
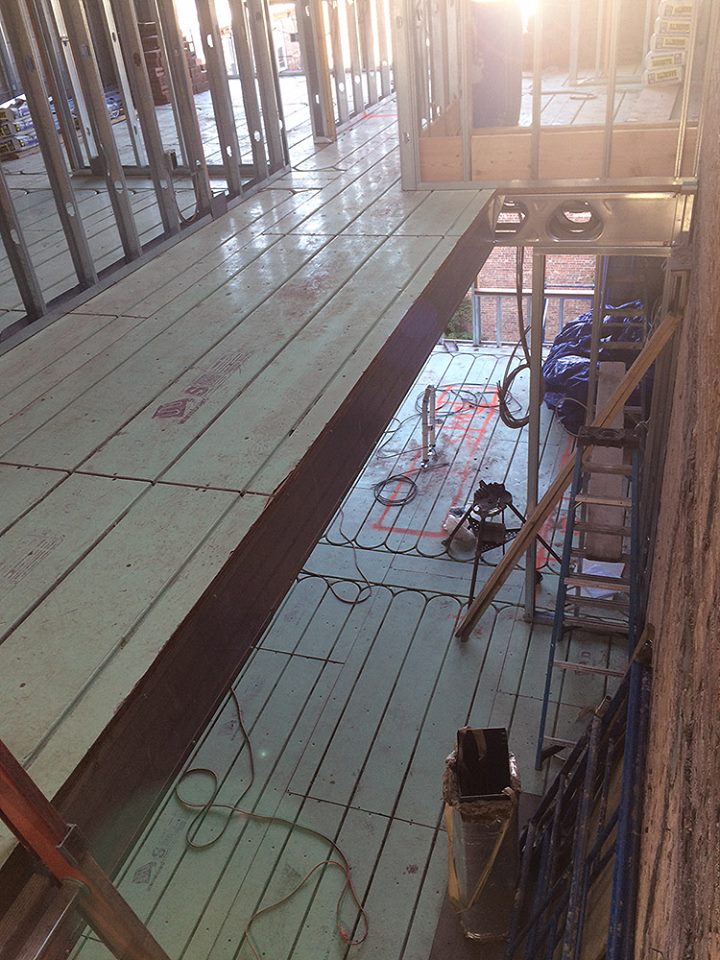
Warmboard-S panels laid as the floor of an upper storey during construction

Sound and the NCC

In apartments and other Class 2 and 3 buildings, Part F7 of the National Construction Code (Volume One) sets sound insulation levels for floors between sole-occupancy units: an airborne rating of Rw + Ctr not less than 50, and an impact rating of Ln,w not more than 62.

Warmboard is one layer in the floor and ceiling assembly. Whether the floor meets these levels depends on the whole assembly, including the floor covering, underlay, framing, insulation and ceiling, so an acoustic consultant should confirm the design.

Warmboard sits directly under the floor covering, with no concrete topping, so the heating responds quickly while the acoustic layers are designed around it.

Finish floor heights

Warmboard adds very little height to the floor build-up, which helps with door thresholds, stair heights and level changes:

Warmboard-S: 28.6 mm, laid as the structural subfloor in place of the flooring sheet.
Warmboard-R: 20.6 mm, plus 1.7 mm reflective foil underneath, over an existing floor.

Add the thickness of the chosen floor covering and its underlay or adhesive to find the finished floor height. We can help you check the details.
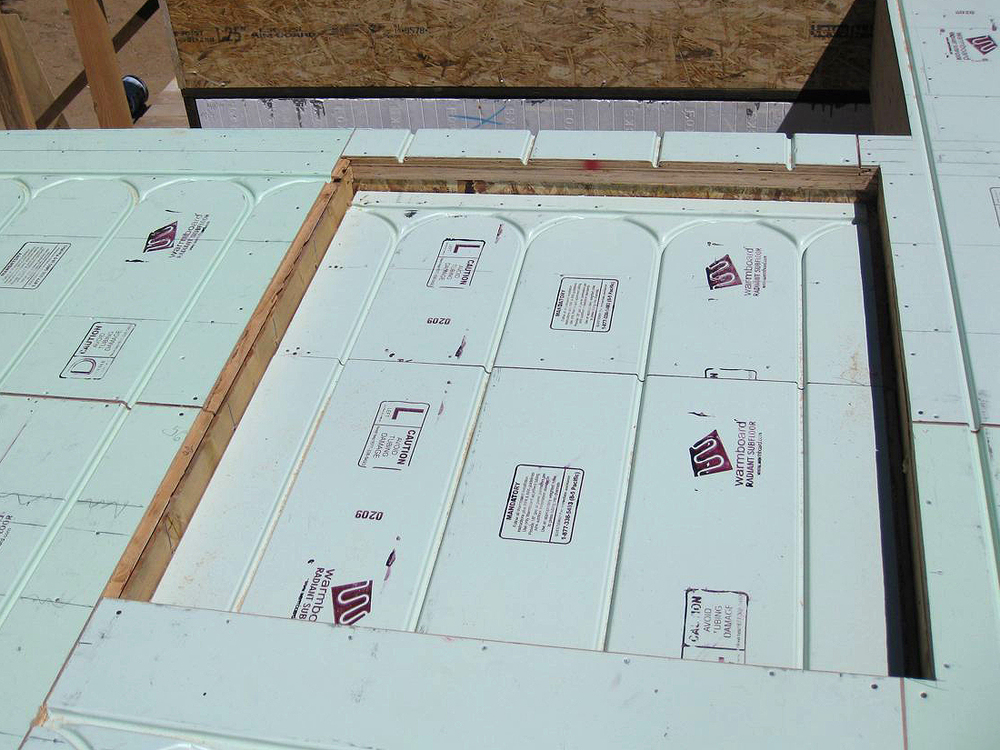
Warmboard-S panels set low between framing to finish level with the surrounding floor

Design work and sample plans

The Warmboard design team draws the plans for every Australian project, working with us and to our specification: Warmboard panels, AL-PEX pipe loops, manifold positions, the heat pump position and thermostat controls. Here’s what’s included:

  • Preliminary drawings:
    An early layout for planning and pricing, with manifold and plant positions.
  • System drawings:
    The detailed system design once the project is confirmed.
  • Panel and pipe drawings:
    Where each panel goes, by type, and the route of every pipe loop.
  • Detail drawings:
    Answers to common construction questions.
  • Specification pages:
    For the panels, pipe and manifolds, heat source and controls.

Ready to get started?

Upload your plans and we’ll get started. If you have more questions, contact us and we’ll get back to you soon.

Who's responsible for what

Warmboard Australia supplies Warmboard panels, the panel layout and pipe loop plans drawn by the Warmboard design team, and product and installation advice. We are not builders, plumbers or engineers.

  • Structural design:
    Your structural engineer specifies the floor framing, joist sizes and fixing, and approves Warmboard-S where it forms the structural floor.
  • Building work:
    Your licensed builder lays Warmboard-S over joists to the engineer’s details and is responsible for the building work and its compliance.
  • Plumbing and heat source:
    Your licensed plumber designs the plumbing connections, installs the pipe, manifolds and heat source, and commissions the system.
  • Building approval:
    Your building surveyor or certifier confirms the work meets the National Construction Code and local requirements.
  • Floor coverings:
    Your flooring installer lays the floor covering to its maker’s instructions for heated floors.

Our layout plans and advice are based on the information you give us. Please check them against your project’s documents before work starts.